Cracked concrete can be an eyesore and a safety hazard, affecting the appearance and functionality of driveways, patios, and other surfaces. DIY Concrete crack repair has become a crucial skill for homeowners and property managers looking to maintain their investments. Understanding how to fix cracks in concrete not only enhances the esthetics of your property but also prevents further damage and extends the lifespan of your concrete structures.
This guide will explore the ins and outs of concrete crack repair, covering everything from understanding the root causes to implementing effective repair techniques. Readers will learn how to prepare for concrete repairs, follow a step-by-step process to fix cracks in concrete driveways and patios, and discover strategies to prevent future cracking. By the end, you'll have the knowledge to tackle common concrete issues and keep your surfaces looking their best for years to come.
Understanding Concrete Cracks
Concrete is a popular material for construction projects, but it's not perfect. The cracking of concrete is a common issue that contractors and homeowners face [1]. To effectively address concrete crack repair, it's essential to understand the types of cracks, their causes, and when they become a cause for concern.
Types of Concrete Cracks
- Hairline Cracks: These are very thin cracks that can develop in concrete foundations as they cure. They're caused by moisture loss during the drying process and can run deep despite their thinness.
- Settling Cracks: These cracks appear wider at the bottom and top and thinner in the middle. They occur when there's a space between the concrete and the ground beneath it, often due to improper ground preparation.
- Shrinkage Cracks: Despite their name, these cracks don't appear shrunk. They're slim and short, spreading both vertically and horizontally. They're caused by rapid drying of concrete in its "plastic" state before hardening.
- Heaving Cracks: These cracks appear only on concrete floors or ground, not on walls. They can span the whole length of a foundation and are caused by soil expansion due to freezing or excess moisture.
- Expansion Cracks: These cracks run both horizontally and diagonally, appearing jagged and deep. They're caused by thermal expansion due to heat.
- Spalling and Scaling: These aren't typical cracks but appear as flaking or chipping of the concrete surface. Spalling results in large chunks missing, while scaling shows as localized peeling or flaking [2].
Common Causes of Cracks
- Shrinkage: As concrete dries and hardens, it shrinks, causing stress that can lead to cracking.
- Excessive Water: Adding too much water during mixing can lead to more shrinkage and cracking.
- Expansion and Contraction: Temperature changes cause concrete to expand and contract, leading to cracks if there's no room for movement.
- Lack of Proper Joints: Without control and expansion joints, concrete is more prone to random cracking.
- Low-Strength Concrete: Poor-quality or low-strength concrete is more susceptible to cracking.
- Weight Overloading: Placing too much weight on concrete can cause it to crack.
- Freezing Temperatures: When water seeps into concrete and freezes, it expands, putting pressure on the concrete and causing cracks [1].
- Tree Roots: Growing tree roots can put pressure on concrete, leading to cracks [1] [3].
- Slab Settlement: When concrete slabs sink into expansive soil, it can result in uneven settling and cracking [3].
When to Worry About Cracks
Not all cracks are cause for immediate concern, but some require attention:
- Crack Width: Cracks that are 0.3 mm or greater can pose an issue for durability and watertightness. These can lead to concrete deterioration, affecting its strength and durability.
- Active vs. Dormant Cracks: Understanding whether cracks are active (still moving or growing) or dormant (stable) is crucial for effective repair.
- Structural Integrity: Cracks that are ⅛" or wider, often extending through the entire thickness of the concrete, may compromise the structure's integrity.
- Water Penetration: Even small cracks can act as passageways for water and chemicals, potentially leading to more significant problems if left untreated.
- Pattern and Location: Certain crack patterns, such as those around corners or in stair-step patterns near building perimeters, may indicate foundation settlement issues [4][5].
Understanding these aspects of concrete cracks helps in diagnosing issues and determining the appropriate repair method. While some cracks are purely cosmetic, others may require immediate attention to prevent further damage and ensure the longevity of the concrete structure.
Preparing for Concrete Crack Repair
Tools and Materials Needed
To effectively repair concrete cracks, it's essential to gather the right tools and materials. These typically include:
- Concrete caulk (polyurethane-based)
- Caulk gun
- Backer rod (for wide or deep cracks)
- Spray bottle with soapy water
- Dry sand
- Chisel or angle grinder
- Wire brush
- Concrete bonding agent
- Concrete patching compound
When selecting concrete caulk, choose between self-leveling and non-sag options. Self-leveling caulk is runny and levels itself, while non-sag caulk is thicker and requires manual smoothing. For optimal results, use both types in conjunction [6].
Safety Precautions
Concrete work can be hazardous, with over 250,000 people working with concrete daily and around 28,000 injuries occurring each year [7]. To ensure safety during concrete crack repair:
- Wear appropriate personal protective equipment (PPE):
- Heavy-duty waterproof gloves
- Slip-resistant boots
- Safety glasses
- Full-length clothing
- P-95, N-95, or R-95 face mask
- Use proper lifting techniques to avoid back injuries
- Be cautious of electrical hazards when using tools with long handles
- Ensure proper ventilation in the work area
- Have eyewash stations and washing-up facilities readily available
Prolonged exposure to concrete dust can lead to serious health issues, including skin irritation, chemical burns, and respiratory problems [7]. Always prioritize safety to prevent injuries and long-term health effects.
Cleaning and Prepping the Crack
Proper preparation is crucial for effective concrete crack repair. Follow these steps:
- Remove loose debris: Use a wire brush or angle grinder to clean the crack and surrounding area thoroughly.
- Widen the crack: Use a chisel or angle grinder to expand the crack to at least 1/4 inch deep and 1/2 inch wide. This ensures better adhesion of the patching compound.
- Clean the area: Use a pressure washer with a concrete outdoor cleaning solution to remove stains, mold, and dirt. Apply the solution at low pressure, then switch to high pressure for a thorough clean.
- Remove old patch materials: Break up any existing concrete patch materials using a hammer or masonry chisel.
- Clear vegetation: Pull out any weeds or grass growing in the cracks.
- Final cleaning: Use a broom, leaf blower, or shop vacuum to remove any remaining debris from the driveway.
- Allow the area to dry completely before proceeding with the repair [8][9].
By following these preparation steps, you'll create an ideal surface for the concrete repair materials to adhere to, ensuring a more durable and long-lasting fix for your concrete cracks.
Step-by-Step Concrete Crack Repair Guide
Choosing the Right Repair Product
Selecting the appropriate repair product is crucial for effective concrete crack repair. For cracks less than 1/4-inch wide, flexible concrete caulk is often the best choice. These products are designed to adhere to concrete's rough surface and flex with its natural expansion and contraction due to temperature changes and moisture retention. For wider cracks, epoxy or polyurea-based products may be more suitable [10].
When dealing with exterior slabs exposed to water and freeze-thaw cycles, such as driveways, sidewalks, and patios, flexible concrete caulk has become the preferred option. It keeps moisture out and moves with the concrete, unlike rigid materials like mortar, grout, or extra concrete, which can crack off over time [10].
For interior slabs that will be covered later, such as garage floors being prepared for an epoxy coating, epoxy or polyurea crack fillers are often more appropriate. These products can be shaved down for a smooth surface and are better suited for controlled environments where the concrete undergoes less movement [10].
Applying the Repair Material
- Clean the crack: Use a wire brush or angle grinder to remove loose debris and thoroughly clean the crack and surrounding area.
- Widen the crack: For better adhesion, use a chisel or angle grinder to expand the crack to at least 1/4 inch deep and 1/2 inch wide.
- Fill deep cracks: For cracks wider than 1/4-inch, insert a foam backer rod or sand to minimize the amount of filler needed and ensure a more uniform repair.
- Apply the repair material: For caulk-based products, use a caulking gun to apply the material directly into the crack. For epoxy or polyurea fillers, mix the components according to the manufacturer's instructions and pour or inject the mixture into the crack.
- Smooth the surface: For caulk, use a putty knife to spread it evenly over the crack and scrape off any excess. For epoxy or polyurea fillers, slightly overfill the crack to ensure complete coverage [10][11].
Curing and Finishing
- Allow proper curing time: Curing and drying times vary depending on the product used, temperature, and humidity. Some fast-setting products may harden in a few hours, while others may take several days to a week to fully cure [10].
- Avoid forced drying: Let the repair material cure naturally for best results.
- Sand or grind excess material: Once the filler has hardened, use an angle grinder or floor grinder to smooth out any excess material, ensuring the repair is flush with the surrounding concrete surface.
- Clean up: Sweep or vacuum the repaired area to remove any dust or debris, allowing you to inspect the final result [11].
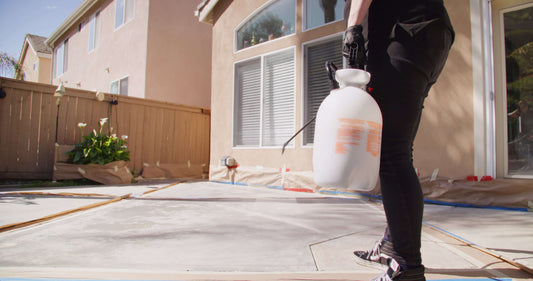
Resurfacing with LikeNu Concrete Restoration Kit
For a concrete restoration solution, consider using the LikeNu Concrete Restoration Kit. This innovative product offers several advantages:
- Versatility: LikeNu can be applied to various concrete areas, including pool decks, driveways, patios and more.
- Easy-to-Use: Simply apply a light coat of Like Nu on your concrete surface using a deck or garden pump sprayer.
- Durable: Looks, feels, and wears like standard concrete. Unlike coating and overlays, Like-Nu allows the concrete to breathe preventing peeling and blistering. Reapply every 2 to 4 years to keep the finish Like-Nu and use sealers to extend life even further. Our UV Performance is comparable to standard concrete.
- Quick drying: The product dries within 30 minutes.
By following these steps and using the appropriate products, homeowners can effectively repair concrete cracks and restore their surfaces to a like-new condition.
Preventing Future Concrete Cracks
Regular Maintenance Tips
To extend the service life of concrete driveways, patios, and walkways, regular maintenance is crucial. Cleaning concrete at least once a year using water and soap helps remove normal dirt, grime, and stains. For tougher stains, a consumer pressure washer can be effective, but care should be taken to avoid using it in existing cracks.
Applying a concrete sealer is another essential maintenance step. Acrylic sealers offer protection against oil, staining, and water intrusion. It's recommended to seal concrete before the first winter and reapply periodically, typically every two years or when the finish begins to show wear.
To prevent minor chipping and cracks, avoid dropping sharp objects or using sharp blades like ice chippers on the concrete surface. When removing snow, raise snowblower blades and use plastic shovels instead of metal ones [13][14].
Proper Drainage Solutions
Managing water drainage around the home is key to preventing concrete cracks. The soil grading around the perimeter should slope away from the house and be well compacted. This minimizes water accumulation near the foundation, which can cause damp basements and freeze-thaw damage.
Gutters play a crucial role in water management. They should be kept clear of debris, and downspouts should ideally extend 4 to 6 feet away from the foundation. Proper installation and pitching of the home's drainage system are imperative to prevent waterlogging [15].
Professional Inspection and Treatment
Regular inspections by professionals are essential for early detection and prevention of further deterioration. Experts can spot signs like deep cracks or uneven surfaces that may indicate more serious issues. Early detection by professionals can save time and money by preventing minor problems from becoming major ones [16].
In cases of significant settlement or movement, consulting a licensed structural engineer or a qualified foundation expert for a comprehensive evaluation is recommended [15]. These professionals can assess and fix serious damage, ensuring safety and durability [16].
For concrete that shows signs of water damage or weakening, a contractor can check for potential mold presence and assess the overall condition. In some cases, more extensive measures may be necessary, such as excavation around the foundation to add a membrane or installing a water management system in the basement [17].
By implementing these preventive measures and seeking professional help when needed, homeowners can significantly reduce the likelihood of future concrete cracks and extend the lifespan of their concrete structures.
Conclusion
Concrete crack repair is a crucial skill for maintaining the beauty and functionality of driveways, patios, and other surfaces. By understanding the types and causes of cracks, preparing properly, and following the right repair techniques, homeowners can tackle this common issue effectively. Regular maintenance, proper drainage solutions, and professional inspections play a key role in preventing future cracks and extending the lifespan of concrete structures.
With the right knowledge and tools, anyone can improve their concrete surfaces and boost their property's curb appeal. To get started on your concrete restoration project and enhance your home's curb appeal, check out the Like Nu Concrete Restoration Kit. Whether you're dealing with minor hairline cracks or more significant issues, taking action now can save you time and money in the long run. Remember, a well-maintained concrete surface not only looks great but also adds value to your home.
FAQs
What are the most effective methods for repairing cracks in concrete driveways?
There are four primary methods to repair concrete cracks effectively:
- Epoxy Injection: Ideal for very thin cracks, as narrow as 0.002 inches. This method fills the crack completely.
- Routing and Sealing: This technique involves enlarging the crack along its exposed face and sealing it with a suitable material.
- Stitching the Crack: This method uses pieces of metal that are anchored across the crack to hold it together.
- Drilling and Plugging: This approach involves drilling down the length of the crack and then filling it with a material that forms a permanent bond.
Is it possible to repair cracks in a concrete driveway?
Yes, cracks in a concrete driveway can definitely be repaired. For shallow cracks, a simple resurfacing compound may suffice. Deeper cracks, however, might require more intensive repairs such as filling the cracks with a special sealant to prevent further damage and to restore the appearance of the driveway. Many of these repairs can be performed as DIY projects.
How can I permanently repair cracks in my driveway?
To permanently fix cracks in your driveway, follow these steps:
- Inspect the Damage: Begin by closely examining the cracks to determine the extent of the damage.
- Clean the Area: Ensure the driveway surface around the cracks is clean and free from debris.
- Apply Sealant: Use a quality sealant to fill the cracks thoroughly.
- Seal and Resurface: Consider sealing and resurfacing the entire driveway to ensure a uniform appearance.
- Allow to Dry: Give your driveway adequate time to dry completely after the repair.
What is the best material to use for concrete crack repair?
Polyurethane-based sealants are highly recommended for repairing concrete cracks. Products like Sakrete Non-Sag Sealant and Sakrete Self-Leveling Sealant are particularly effective for cracks up to half an inch deep and wide. These sealants not only provide a strong bond and flexibility but also have a long-lasting effect. Note that cleaning up after using polyurethane-based products typically requires acetone or similar chemicals.
References
[1] - https://www.apdecks.com/why-does-concrete-crack-top-8-reasons/
[2] - https://www.angi.com/articles/types-of-cracks-in-concrete.htm
[3] - https://www.dalinghausconstruction.com/blog/why-is-my-concrete-patio-cracking-5-primary-reasons/
[4] - https://waterstopsolutions.com.au/how-do-you-know-if-a-concrete-crack-is-serious-and-needing-repair/
[5] - https://www.a1concrete.com/concrete-repair-learning-center/concrete-crack-types
[6] - https://www.a1concrete.com/concrete-repair-learning-center/driveway-crack-repair
[7] - https://www.rakenapp.com/features/toolbox-talks/concrete-work
[8] - https://www.quikrete.com/pdfs/diy-concrete-repair-6-essentials-to-have-on-hand.pdf
[9] - https://www.homedepot.com/c/ah/how-to-fix-cracks-in-concrete/9ba683603be9fa5395fab90147c3431e
[10] - https://www.a1concrete.com/concrete-repair-learning-center/fix-concrete-cracks
[11] - https://tomahawk-power.com/blogs/articles/how-to-repair-cracks-with-epoxy-a-comprehensive-guide?srsltid=AfmBOoo5v30V6L3E_nYGqnXw_xtK1sOQf83aud85HZb8jOGHi2qJYg1k
[12] - http://www.wonderchem.com/asa603/likenu.shtml
[13] - https://markstonelandscaping.com/maintenance-tips-concrete-driveway-patios/
[14] - https://www.concretenetwork.com/concrete/concrete_driveways/how-to-maintain.html
[15] - https://wini.com/articles/foundation-cracks/
[16] - https://truseal-asphalt.com/concrete-101-when-to-seek-professional-concrete-repair/
[17] - https://www.quora.com/Does-putting-a-concrete-walkway-around-a-house-prevent-water-into-the-foundation-or-are-there-better-ways-I-have-leaks-into-cracks-in-the-basement